Showing posts with label How to. Show all posts

Wednesday, January 16, 2019

How to Make A Marble Tile Look Backdrop


This is a super simple backdrop that can be made very inexpensively! 

Here is what you will need:
Please note that all measurements for this tutorial are for the 30" x 20" poster board. 

-2 Poster boards (one for background and then one for the 'ground')(Mine is the Elmer's brand one and is 30"x20")
-Marble contact/shelf paper (I used this kind)
-Scissors
-Pen or pencil
-Ruler
-Paper trimmer (this is optional, but it helps to get the tiles straight)

1. Start off by deciding what kind of pattern you want. (Here are some ideas.) I wanted a classic subway tile look. A typical subway tile is 3"x6", so I knew I needed to cut my tiles close to that size. 

2. Since I need my tiles to fit the background and also have room for spacing between them, I had to cut the tiles to just under 6" wide. So I cut mine to 5 3/4" x 3".

I cut: 
27 - 5 3/4" x 3"

6 - 2 3/4" x 3" tiles (for every other line)

5 - 5 3/4" x 1" tiles.

3. Now you are ready to start applying your tiles to the poster board. We are going to use the 5 3/4" x 3" tiles first. Lay the poster board lengthwise in front of you, and, starting at the top left corner, adhere the first tile to the board by lining it up along the edge. Continue adhering your tiles to the board, being sure to leave about a 1/8" space between each tile. Your first row should look like this:
I just guesstimated on it. If you are really concerned about it being perfect you can use a ruler and mark where each tile needs to be placed, but guessing will look just fine. I promise no one will be looking that closely!

4. For your second row, you need to start with one of the 5 3/4" x 2 3/4" tiles. This tile needs to be placed about 1/8" below the tile above it, and lined up along the left edge.
 Your second row should look like this:
5. Continue placing your tiles, being sure to alternate between starting each row with the 5 3/4" and the 2 3/4" tiles until you have 6 rows. Your board should end up looking like this:
6. Now you can finish the last row with the 5 3/4" x 1" tiles.

Your finished board should look like this:
7. With your second piece of poster board, cut a piece of contact paper 30" wide and adhere to the board. It helps if you only peel off part of the backing, adhere the contact paper to the edge of the board, and remove the remaining backing as you go.  

And there you have it! Super simple and easy to set up near a window  for some natural light or wherever else you like to take pictures!
http://feeds.feedburner.com/TheDiaryOfNicoleAlicia

Monday, December 14, 2015

Harry Potter Happy Christmas garland

So I haven't posted a DIY project in quite a while, and when I stumbled across this tutorial, I knew I had to make it!

While looking through their instructions though, I thought it was crazy that they wanted you to hand write the letters. Yeah. Like that is going to turn out right! And theirs looked tacky because they traced the letters on the wrong side of the paper so you could see all of the pencil lines! So I thought I would make up my own tutorial AND I made you these nifty printable letters using this free font!

This is what you'll need...

-Thick scrapbooking paper (I thought the gold was pretty! But you could really use whatever you like.)
-String
-Scissors
-Mini clothes pins (I bought those at Walmart for just a couple of dollars. They were with the scrapbooking stuff)
-Letters


Start off by printing out the letters. I'd recommend using cardstock paper because it's thicker and easier to cut out and trace.
I did end up needing the third piece of paper, I didn't realize until after I took this picture that I was short one "S". 

Just make sure when you trace the letters, that they're backwards, because you want the glitter side to have the letters facing the correct way.

Cut out all of your letters.
Then hang them up with the clothes pins! Super simple and fun! 

Wednesday, February 11, 2015

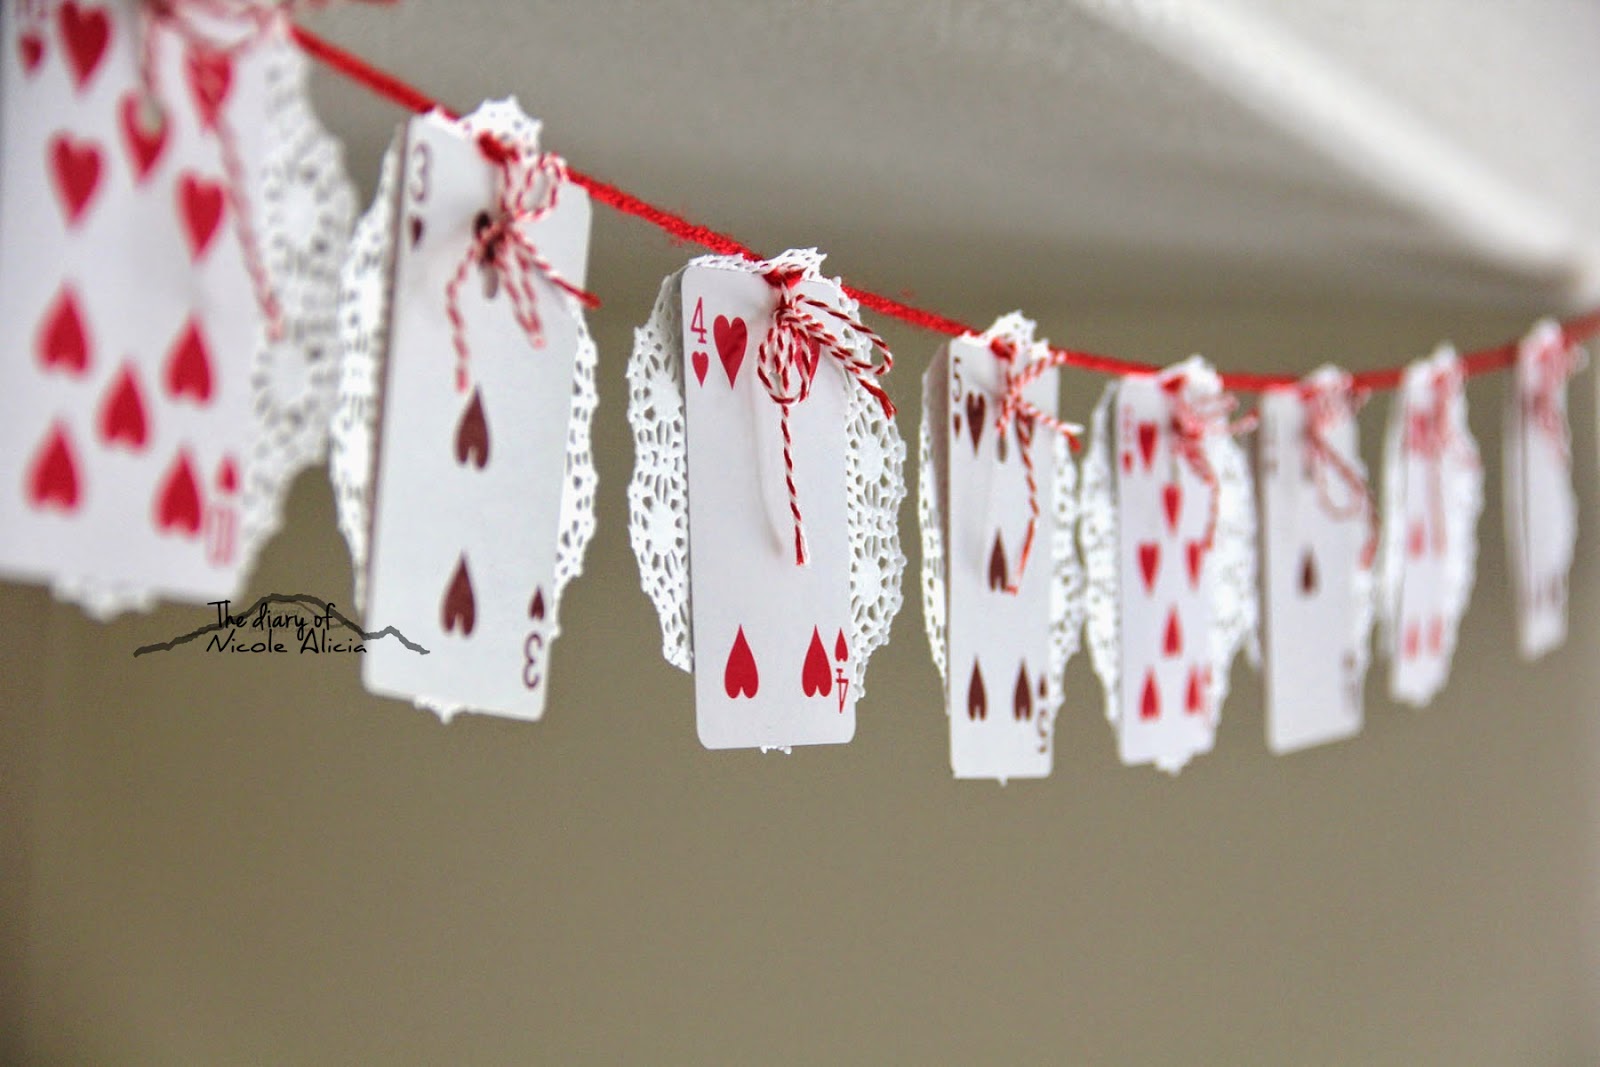
Valentine's day card garland

Hello! Today I'm sharing another Valentine's day garland. (Check out the other one here

I had some playing cards lying around and I thought they would make a fun garland. I looked around on Pinterest for some ideas, but I couldn't find any garlands that I liked using playing cards.
All you need is:
-2 decks of cards (I had a couple decks already that were different sizes and different colors. Just use whatever you have!)
-red yarn (White would look nice as well.)
-red & white bakers twine (I got mine at Target, but this would be great as well.)
-a glue stick
-scotch tape
-a hole punch
Start off by taking a small piece of scotch tape and wrapping it around the end of the yarn. Then twist the very tip a bit so it forms a point.
Thread the end of the yarn through the doilies. 
 Using the hole punch, punch a hole about 3/4 of an inch from the top of the card.
 Cut the twine about 6 inches long. If you are using two full decks, you will need 18 pieces of string cut into 6 inch pieces. (I ended up being short one card.)
 Thread the bakers twine through the card then around the yarn and tie a bow. Then flip the card up and, using the glue stick, swipe some glue onto the doily and press the card back down.
I'm pretty pleased with how it turned out (if I do say so myself!). Hope you enjoy it too!

Wednesday, February 4, 2015

Quick and easy Valentine's day garland

Today I thought I would share a quick and easy Valentine's day garland. I don't have any decorations for Valentine's day, so I went searching for some ideas on Pinterest. I came across some garlands similar to this one, so I thought I would share what I made.
All you will need to make this garland is some pink, red, and white pompoms, as well as a needle and thread. Pretty simple!
I purchased these white pompoms, these red pompoms, and these pink pompoms on Amazon.
Knot one end of the string and thread the pom poms on! Pretty simple and makes a fun decoration!

Wednesday, November 19, 2014

How to make browned butter

Today I thought I would post a quick tutorial on how to make browned butter-or beurre noisette, which is a popular French technique. I started using browned butter this past summer in some of my baked goods. I have used it in bread, muffins and cookies. I haven't tried it in any cooking recipes, but I will definitely be giving it a try soon! It gives off a rich, kind of nutty flavor. So good! It's pretty easy to make and I don't think you will be disappointed! So give it a try next time you bake something!
 Start out by putting your butter (I used 1 stick or 1/2 cup because that is what my recipe called for.) in a skillet on medium-high heat. Some say to slice the butter so it melts faster, but that isn't necessary.
 Keep an eye on it as it melts.
 Give the pan a quick stir.
 Now that it's melted, you need to keep stirring it as it cooks. You do NOT want it to burn!
 It will start to bubble up. Just keep stirring!
 You should notice it starting to turn a light tan/brownish color. It will also give off a nutty smell. Once the bubbles start to subside, turn off your burner and remove the skillet from the heat.
Your butter should look like this now. Those little browned bits in the bottom of the pan? Those are the toasted milk solids.
Now pour the butter into a bowl or dish or whatever. You don't want to leave it in the pan because it will continue cooking and you don't want it to burn! 

Let the butter cool before adding to your recipe. 
Next week I will be posting a recipe using browned butter!
Enjoy!