Showing posts with label easy. Show all posts

Wednesday, January 16, 2019

How to Make A Marble Tile Look Backdrop


This is a super simple backdrop that can be made very inexpensively! 

Here is what you will need:
Please note that all measurements for this tutorial are for the 30" x 20" poster board. 

-2 Poster boards (one for background and then one for the 'ground')(Mine is the Elmer's brand one and is 30"x20")
-Marble contact/shelf paper (I used this kind)
-Scissors
-Pen or pencil
-Ruler
-Paper trimmer (this is optional, but it helps to get the tiles straight)

1. Start off by deciding what kind of pattern you want. (Here are some ideas.) I wanted a classic subway tile look. A typical subway tile is 3"x6", so I knew I needed to cut my tiles close to that size. 

2. Since I need my tiles to fit the background and also have room for spacing between them, I had to cut the tiles to just under 6" wide. So I cut mine to 5 3/4" x 3".

I cut: 
27 - 5 3/4" x 3"

6 - 2 3/4" x 3" tiles (for every other line)

5 - 5 3/4" x 1" tiles.

3. Now you are ready to start applying your tiles to the poster board. We are going to use the 5 3/4" x 3" tiles first. Lay the poster board lengthwise in front of you, and, starting at the top left corner, adhere the first tile to the board by lining it up along the edge. Continue adhering your tiles to the board, being sure to leave about a 1/8" space between each tile. Your first row should look like this:
I just guesstimated on it. If you are really concerned about it being perfect you can use a ruler and mark where each tile needs to be placed, but guessing will look just fine. I promise no one will be looking that closely!

4. For your second row, you need to start with one of the 5 3/4" x 2 3/4" tiles. This tile needs to be placed about 1/8" below the tile above it, and lined up along the left edge.
 Your second row should look like this:
5. Continue placing your tiles, being sure to alternate between starting each row with the 5 3/4" and the 2 3/4" tiles until you have 6 rows. Your board should end up looking like this:
6. Now you can finish the last row with the 5 3/4" x 1" tiles.

Your finished board should look like this:
7. With your second piece of poster board, cut a piece of contact paper 30" wide and adhere to the board. It helps if you only peel off part of the backing, adhere the contact paper to the edge of the board, and remove the remaining backing as you go.  

And there you have it! Super simple and easy to set up near a window  for some natural light or wherever else you like to take pictures!
http://feeds.feedburner.com/TheDiaryOfNicoleAlicia

Monday, August 28, 2017

Soft Maple & Brown Sugar Granola

Breakfast is my least favorite meal of the day. I'm just not usually hungry in the morning and I have a hard time finding things I like as I don't like to eat a heavy meal first thing. I typically just make a protein shake with lots of spinach and stuff, but that gets tiring after a while. 

I wanted to find something healthy, yet filling, so I started researching granola recipes. I tried a few, but just didn't find anything I really liked. I have found that most of the store bought granola is so hard that my jaw would be sore from chewing it! So I decided to just come up with my own recipe. 

After making it one time it was a hit and it was gone in just a couple of days! I've since made it several more times (and I usually double this recipe so it's enough for my family!) and I think I've got it just right! Hope you enjoy!
Soft Maple & Brown Sugar Granola

(3 cups oats total)
1 1/2 cups regular rolled or steel cut oats
1 1/2 cups quick rolled oats
1/4 cup butter
1/4 cup coconut oil
1/3 cup pure maple syrup
1/2 cup brown sugar
1 tablespoon vanilla
1 tsp almond extract
1/2 cup coarsely chopped pecans
1/4 cup sliced almonds
1/4 tsp cinnamon (optional)
1/4 tsp nutmeg (optional)

1. Preheat oven to 350°.

2. Arrange pecans and almonds on baking sheet and bake for 8-10 minutes or until fragrant and lightly browned. Set aside.

3. Once the nuts have been toasted, reduce oven temperature to 300°.

4. Line a baking sheet with parchment paper and set aside.

5. Add oats, cinnamon, and nutmeg to a large bowl bowl. Set aside.

6. In a medium microwave-proof bowl, melt butter and coconut oil in microwave at 30 second intervals. Set aside to cool to room temperature.

7. Add maple syrup, brown sugar, vanilla, and almond extract to butter/coconut oil. Stir to combine.

8. Pour maple syrup and oil mixture over oats and stir to combine.

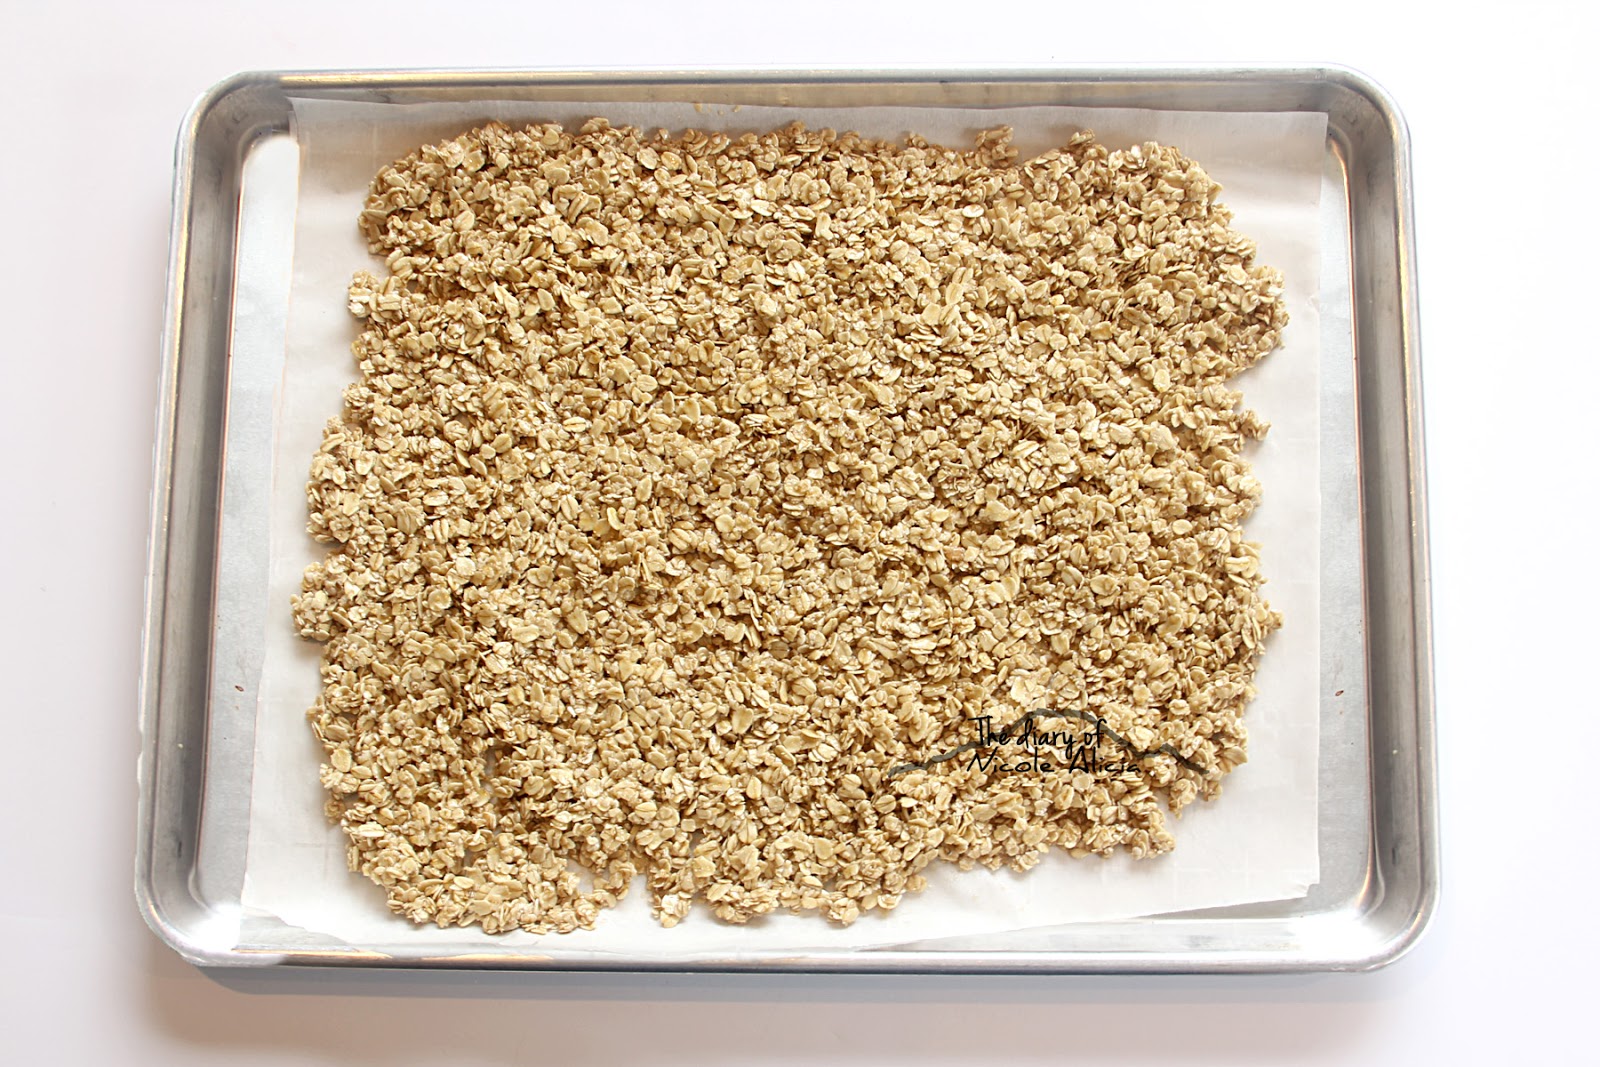
9. Pour granola onto baking sheet that has been layered with parchment paper and spread into a thin layer.

10. Bake for 15 minutes. Remove from oven and stir around with a spoon. Mixture will look really liquidy but it is fine. The oats will absorb the moisture as it continues to cook. Rotate pan 180° and put back in oven to bake for another 15 minutes. Remove from oven, stir, rotate pan again, and return to oven for another 10 minutes. After that it should be done.

Depending on your oven and if you do want a crunchier granola, return to oven for another 10 minutes. Be careful not to overcook because even once it is removed from the oven, it will continue to cook a bit on the hot baking sheet. I would recommend making the granola as the recipe is written, then adjusting to your preference from there.

I do not like to break the granola up too much while I am cooking it as we like more of the granola clumps. If you do not like clumps in your granola, feel free to break it up more as you cook it. 

Once the granola is finished you can add in dried fruit or even mini chocolate chips if you desire. The great thing about it is there are so many variations on what you can put in it! 
http://feeds.feedburner.com/TheDiaryOfNicoleAlicia

Monday, July 25, 2016

Strawberry spinach salad recipe

This strawberry spinach salad is pretty popular around my house! It's definitely a summertime favorite! My mom came across the recipe somewhere on the internet years ago (if you know the original source, please let me know!) and I've made a few changes to the original recipe so it tastes even better! 

The salad is full of flavor and the perfect side to just about any dish! I hope if you give it a try you'll like it!
Easy strawberry spinach salad
The salad itself is pretty simple, just these four ingredients!
Toasted pecans
I start off by chopping (or you can buy pre-chopped pecans) and placing them on a baking sheet. Toasting them in the oven helps to bring out the toasty goodness of the pecans and give the salad so much more flavor! 

Toasting the pecans first gives them enough time to cool down while you prepare everything else.
Smoked Gouda cheese
Next dice the cheese.
Strawberries
Wash the strawberries.
Strawberries
Slice or dice the strawberries into bite sized pieces. If you're using big strawberries, you might want to dice them, otherwise with smaller strawberries you could just slice them. However you prefer to eat them!Easy strawberry spinach salad
The dressing is pretty simple too; just a couple of ingredients mixed together!
Easy strawberry spinach salad
And the salad is ready!
Easy strawberry spinach salad
Strawberry Spinach Salad
For the salad
1 5oz sized package of spinach
1 1/2 cups pecan pieces
3/4 cup smoked Gouda cheese*
2 cups chopped strawberries

*I buy the smoked Gouda cheese in the deli section of the grocery store and ask for about a 1 inch chunk.

1. Preheat the oven to 350°. 

2. Chop the pecans into pieces and spread out on a small baking sheet. Toast for about 6 minutes or until they start to smell toasted and look slightly browned. Set aside to cool.

3. Slice and dice the cheese, set aside.

4. Rinse or wash the strawberries in a produce wash, then pat dry with a towel. Cut strawberries into slices or cubes (whichever you prefer).

5. Place spinach in a large bowl, then top with strawberries, Gouda cheese, and the toasted pecans.

For the dressing
3 tablespoons honey
3 tablespoons lime juice
1 1/2 tablespoons vegetable oil
A little over 1/4 tsp. ground ginger

1. Stir until everything is combined.

And that's it! Pretty simple! Enjoy!

Monday, December 14, 2015

Harry Potter Happy Christmas garland

So I haven't posted a DIY project in quite a while, and when I stumbled across this tutorial, I knew I had to make it!

While looking through their instructions though, I thought it was crazy that they wanted you to hand write the letters. Yeah. Like that is going to turn out right! And theirs looked tacky because they traced the letters on the wrong side of the paper so you could see all of the pencil lines! So I thought I would make up my own tutorial AND I made you these nifty printable letters using this free font!

This is what you'll need...

-Thick scrapbooking paper (I thought the gold was pretty! But you could really use whatever you like.)
-String
-Scissors
-Mini clothes pins (I bought those at Walmart for just a couple of dollars. They were with the scrapbooking stuff)
-Letters


Start off by printing out the letters. I'd recommend using cardstock paper because it's thicker and easier to cut out and trace.
I did end up needing the third piece of paper, I didn't realize until after I took this picture that I was short one "S". 

Just make sure when you trace the letters, that they're backwards, because you want the glitter side to have the letters facing the correct way.

Cut out all of your letters.
Then hang them up with the clothes pins! Super simple and fun!